Summer break is a great time for children to relax and have fun!
Along with backyard barbecues, relaxing trips to the beach, epic vacations, and other fun in the sun, this also means that school is out for the year.
And for many parents, that means you need every trick in the book to keep your kids entertained while they are out of the classroom.
Fortunately, summer crafts for kids are an educational, affordable, and fun way to keep children of all ages from that dreaded boredom all summer long.
All Fitness by the Sea campers get to experience these crafts at our Santa Monica and Los Angeles summer camps, and now you can too!
Below we’ll walk you through 30 craft ideas you can do with kids of all ages, step-by-step (materials list included).
Table of Contents
Easy Summer Crafts for Kids
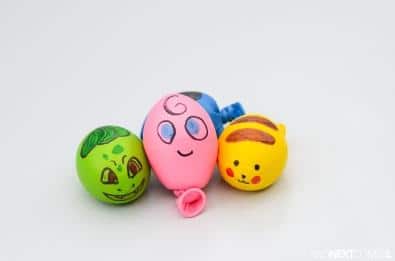
1. Stress balls
These easy stress balls are a quick craft project that requires minimal cleanup.
Since it requires using permanent markers, we suggest saving this for children over the age of five.
Time Estimate:
45 minutes
Age:
5+
Materials:
- Balloons
- Sand, rice, or flour
- Funnel
- Scissors
- Permanent markers
Instructions:
- Start by having your kids stretch out the balloon. They can do this by simply stretching it with their hands or blowing it up and releasing the air.
- Next, have your kids pick their preferred filling.
- Place a funnel into the neck of the balloon and have your kids carefully pour the sand, rice or flour into the funnel until the balloon is full.
- Remove the funnel and press out any excess air.
- Tightly knot the top of the balloon. (Note: Younger children may need assistance with this to ensure it is secure)
- Have your kids cut off any excess rubber.
- And now for the fun part – let your kids decorate their newly created stress balls with silly faces and fun designs.
- Allow ink to fully dry before using.
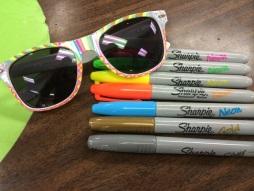
2. Design-your-own sunglasses
Always a crowd pleaser, these DIY sunglasses are one of the most popular summer crafts for kids that we’ve found.
The best part is, they only require minimal supplies — and even less clean up!
Since this project requires permanent markers, we suggest saving it for children over the age of five.
Time Estimate:
20 minutes
Age:
5+
Materials:
- Plain sunglasses
- Markers
- Stickers
- Glitter
- Jewels
- Adhesive
- Any other decorations you’d like to use
Instructions:
- Gather all materials.
- Let kids decorate glasses as they please.
- Allow any glitter, jewels, and other items that are glued on to dry completely.
- Wow the world with your beautiful, new sunglasses!
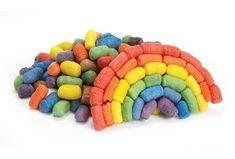
3. Magic Nuudles
Let’s face it.
Some days you just aren’t in the mood to supervise an elaborate crafting project.
For times like this, we suggest this extremely simple project that will keep kids busy for hours, building exciting new creations!
Time Estimate:
1 hour
Age:
3+
Materials:
- Magic Nuudles
- A damp paper towel
Instructions:
- Provide wet paper towels for your kids to dab the nuudles onto.
- Once slightly wet, the nuudles will become sticky and your kids can build whatever they want, similarly to legos.
See? We told you this one was easy!
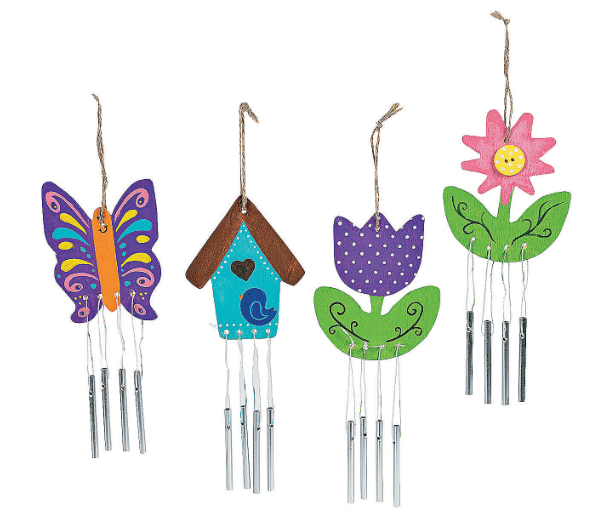
4. Wind chimes
On the hunt for a quick, fun craft to entertain restless children?
These wind chimes require minimal supplies and clean up, and the end result is something your kids can enjoy all summer long.
Time Estimate:
20 minutes
Age:
3+
Materials:
- Pre-made windchimes
- Paint
- Paint brushes
- Water cup
- Glitter
- Stickers
Instructions:
- Place all materials on a flat surface.
- Allow your kids to choose their favorite wind chime.
- Encourage your kids to decorate the chimes with paint, glitter, or whatever crafting materials you have on hand!
Bonus: Feeling creative? We love these homemade wind chime ideas which incorporate many items you may already have at home.
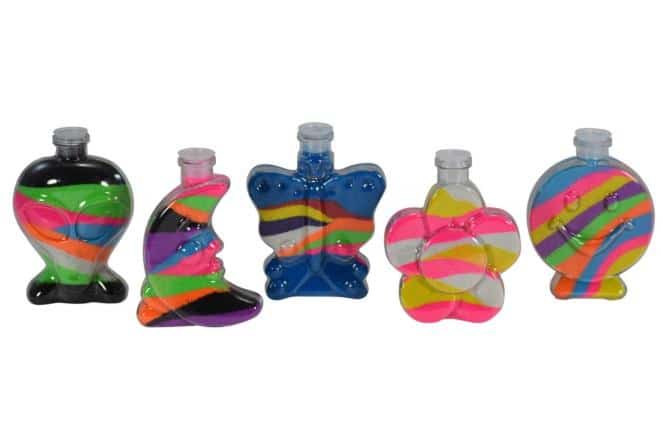
5. Sand art bottles
This calming and peaceful craft is a great way to calm kids down after a busy day.
Even better, it only requires a few supplies and doesn’t require a lot of clean up.
Time Estimate:
30 minutes
Age:
5+
Materials:
- Colored sand (Don’t want to buy pre-colored sand? You and your kids can make your own out of salt and chalk).
- Bottles (You can buy new bottles or save money by using recycled bottles from your home!)
- Funnel
- Measuring cups or scoops
Instructions:
- Pour the different colors of sand into large cups or bowls for easy scooping.
- Place funnel into the top of the bottle.
- Have you kids scoop the sand and pour it through the funnel into the bottle.
- Allow your kids to layer the different colors to create their very own work of art.
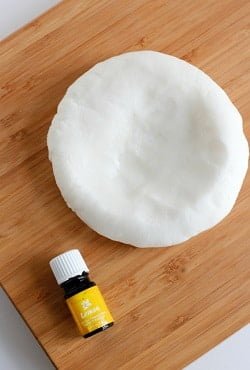
6. Play dough
Play dough is something that everyone loves to use, and with this tutorial, you can make it with only 3 ingredients (source)!
Check it out below.
Time Estimate:
10 minutes
Age:
3+ (adult supervision for heating on the stove)
Materials:
- ½ cup corn starch
- 1 cup baking soda
- ¾ cup water
- Saucepan
- Optional: food coloring or essential oils
Instructions:
- Mix all 3 ingredients (don’t add any food coloring or essential oils just yet) in the saucepan.
- Heat on the stove with medium heat for 4-5 minutes.
- Stir mixture constantly.
- Take mixture off the stove once it starts to form into a solid ball.
- Let cool.
- Optional: add a drop or two of food coloring or essential oils for added fun!
Summer Crafts for Toddlers
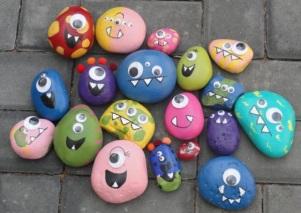
7. Rock magnets
Perfect for kids with an imagination, these simple magnets are an easy and fun activity that will leave kids laughing over their outlandish creations.
If you are looking for summer crafts for toddlers, this classic project is a great place to start.
Time:
1 hour
Age:
3+
Materials:
- 1 River rock
- 2 Googly eyes
- 1 Magnet
- Glue
- Acrylic paint
- Paint brushes
- Water cups
Instructions:
- Have your kids paint the rock their preferred color (or colors!) until the rock is completely covered in paint.
- Let paint dry.
- Once the paint is completely dry, have your kids attach the googly eyes using glue.
- Let the glue dry.
- Finally, use a large dollop of glue to attach the magnet to the rock.
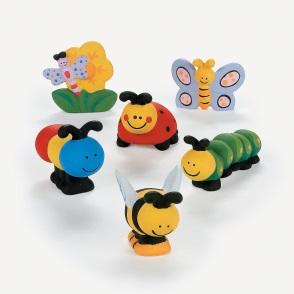
8. Wooden object design
One of the easiest summer crafts for toddlers, this is another of our favorite summertime craft ideas that works for children of all ages!
The end result is a keepsake you will have for years to come.
Time Estimate:
20 minutes
Age:
3+
Materials:
- Wooden objects (Some fun ideas include chalkboards, picture frames, trinket boxes, egg-shaped boxes, and door hangers).
- Paint
- Paint brushes
- Water cup
- Glitter
- Collage stickers
- Jewels
- Anything else you want to use!
Instructions:
- Set up all materials on a flat surface.
- Have your children select the object that they wish to decorate.
- Encourage them to create a unique design using paints, stickers, and other supplies.
- Ensure object is completely dry before using.
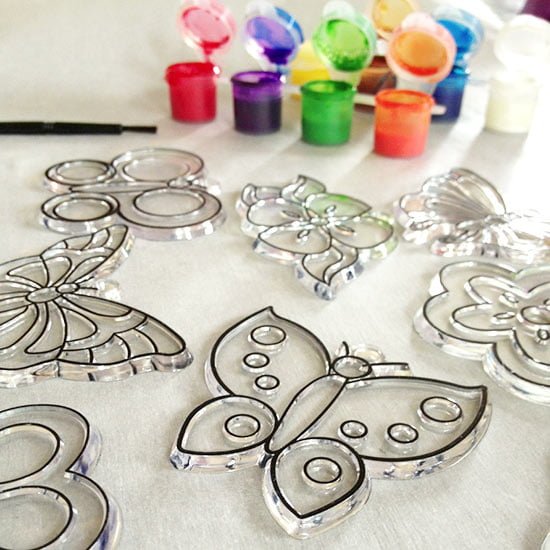
9. Suncatchers
The long days of summer are the perfect time for you and your kids to try your hand at decorating sun catchers.
This is one of the easiest summer crafts for toddlers as well as older children since it is quick and straightforward.
Time Estimate:
20 minutes
Age:
3+
Materials:
- Suncatchers (You can find pre-made sun catchers at most arts and craft stores).
- Craft paint
- Paint brushes
- Water cups
Instructions:
- Have your kids choose their favorite sun catcher.
- Let them decorate the sun catcher with their favorite colors.
- Use water cups to wash out paint brush if switching colors.
- Allow the paint to fully dry and hang in a sunny window.
Bonus: Want to take it to the next level? We also love the idea of creating these adorable tissue paper sun catchers!
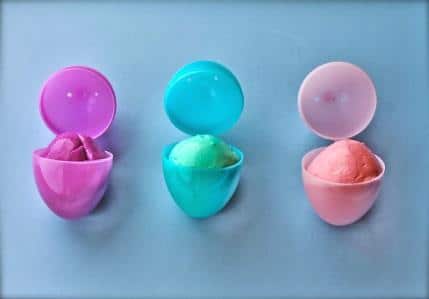
10. DIY putty
This DIY alternative to the store-bought classic will provide you and your kids with hours of fun this summer.
Perfect for children of all ages — this is a wonderful activity for a rainy afternoon since it will keep your kids busy for a while!
Time Estimate:
1 hour
Age:
3+
Materials:
- Putty solution (Note – you should be able to find this at your local craft store, or you can make your own!)
- Plastic cups
- Paint
- Plastic egg or other storage container
Instructions:
- Before you get started, shake your putty solution. This will activate the crystals at the bottom of the jug and create the best results.
- Once the solution is well shaken, pour approximately one to one-and-a-half inches of solution into each kid’s cup.
- Let each kid choose their preferred paint color and add about two tablespoons into the solution.
- Now it is time to get messy! Have your kids mix the paint and putty solution with their hands, until it becomes a firm gel.
- After it has firmed up, remove the putty from the solution. It will get stretchier the longer your kids play with it.
- Store putty in a plastic egg or other container to keep it clean.
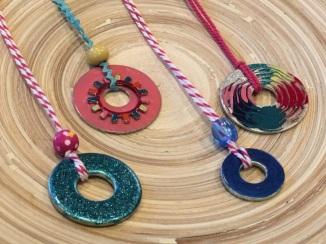
11. Washer necklaces
In our experience with summer crafts for toddlers and older children, we have found that kids always enjoy making something that they can wear!
These washer necklaces are a great project to pull out when you are short on time and don’t want a craft that will require a ton of supplies or clean up.
Time Estimate:
30 minutes
Age:
3+
Materials:
- 1 Metal washer
- String
- Beads
- Glitter
- Paint
- Paint Brushes
- Water Cup
Instructions:
- Set out all supplies and supervise as your children decorate the washers with paint, glitter, and any other supplies you have handy.
- Once the washers are try, work with your kids to place the string through the washer and secure it with a bead.
- Tie a firm knot to form the necklace.
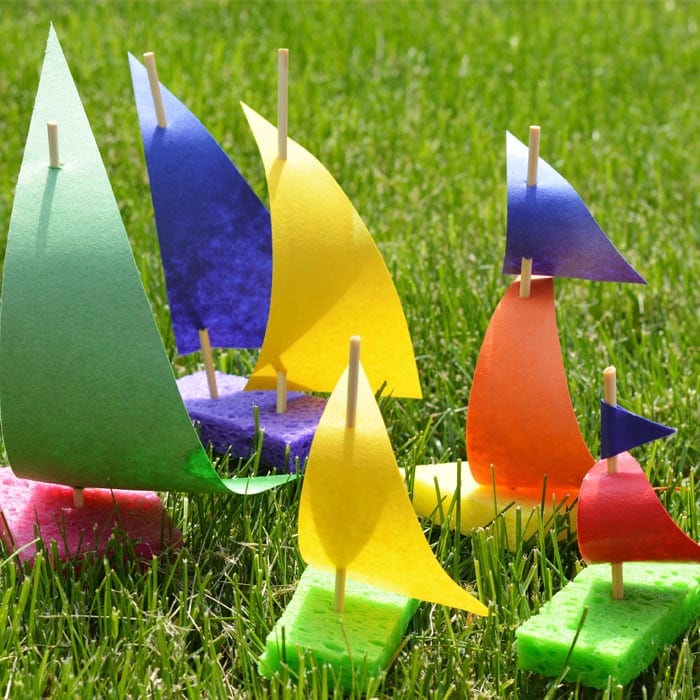
12. Sponge sailboats
Sponge sailboats are super easy to make and fun for younger kids to race around.
Check out just how simple they are to make (source)!
Time Estimate:
20 minutes
Age:
3+
Materials:
- 1 sheet of construction paper
- 1 sponge
- 1 wooden skewer
- Marker or pencil
- Something to poke a hole with (the back of a small paintbrush works well)
- Scissors
- A large body of water (to sail the boats)
Instructions:
- Trace and cut out a large isosceles triangle (see screenshot)
- Use the back of the small paintbrush to poke two holes: one at the top and one at the bottom of the paper triangle, both centered.
- Insert skewer into each hole, making the paper sail.
- Use the bottom of the skewer to poke a hole in the middle of the sponge.
- If your skewer has a sharp point, use the scissors to cut it off.
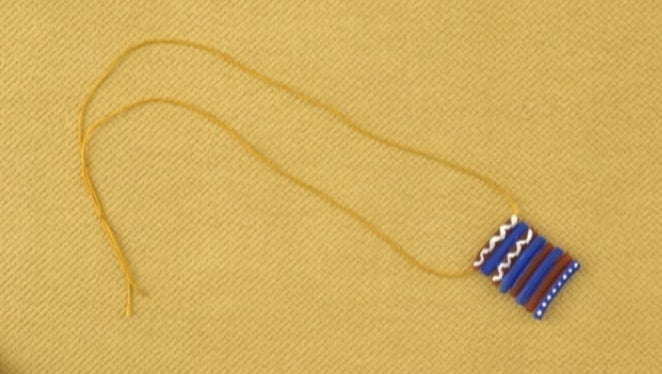
13. Pasta necklaces
Pasta necklaces are a timeless craft that is super easy and cheap to make.
They also allow you to get as creative as you like with them!
Check out how Ultra Zone makes pasta necklaces with a twist below.
Time Estimate:
30-45 minutes (allowing for glue and paint to dry)
Age:
3+
Materials:
- Water
- Yarn
- Paint
- Pasta
- Glue
- Scissors
- Markers
Instructions:
- Stack roughly 5 or 6 pieces of pasta on top of each other.
- Take each piece of pasta and add a line of glue to each. Press pieces of pasta together until all pieces form together. Allow glue to dry.
- Paint your favorite design on the pasta pieces. Allow paint to dry.
- Cut a piece of yarn long enough to form a necklace and thread the yarn through the top piece of pasta.
- Tie a knot in the ends of the yarn to form the necklace.
Fabric & paper crafts for kids
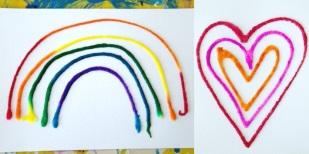
14. Raised Sand Art Painting
When it comes to summer crafts for kids, we are all about incorporating nature!
Next time you head to the beach have your kids collect some sand, and let it inspire their next work of art with this raised sand painting project.
Time Estimate:
45 minutes
Age:
5+
Materials:
- White card stock
- Watercolor paints
- Sand
- Glue
Instructions:
- You may be tempted to skip straight to the glue, but it is key to have your kids draw out their design first.
- After drawing the design on the cardstock, have your kids thoroughly cover the design with a thin layer of glue.
- Once the glue is down, carefully sprinkle the sand to fill or outline the shape, depending on your preference.
- Allow the glue to fully dry.
- Use watercolors to finish painting your design.
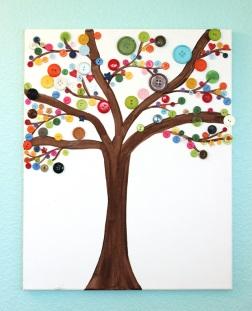
15. Button art
If you are like most of us, you probably have a drawer full of odds and ends, including the extra buttons that come with so many pieces of clothing.
One of our favorite summertime craft ideas, this project will give you a chance to finally put these buttons to good use!
Time Estimate:
45 minutes
Age:
4+
Materials:
- Paper or cardstock
- Markers
- Glue
- Buttons
Optional:
- Paint
- Paint brushes
- Water cup
Instructions:
- Instruct your kids to draw or paint a design on their paper or cardstock.
- Once the initial designs are complete, it’s time to have some fun by incorporating the buttons into the design with glue, resulting in a one-of-a-kind 3D design.
16. Faux paper mache
Want to try a low-maintenance version of paper mache with your kids?
Skip the mess by allowing your children to decorate pre-made paper and cardboard objects like boxes and shapes with this straightforward project.
Have a little extra time on your hands?
Why not DIY your own paper mache objects too!

Time Estimate:
30 minutes
Age:
3+
Materials:
- Paper or cardboard object
- Paint
- Paint brushes
- Water cup
- Markers
- Crayons
- Jewels
- Stickers
- Collage materials
- Glue
- Glitter
- Washi tape
Instructions:
- This summer craft for toddlers is about as easy as it gets – simply lay out the materials and let your kids have a blast creating totally unique designs they will treasure for years to come!
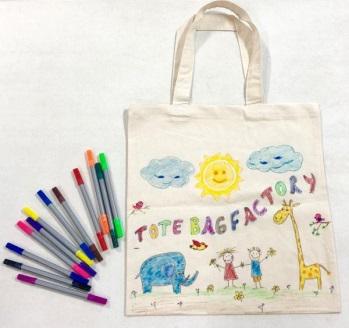
17. Fabric Design
As far as easy summer crafts for kids go, it doesn’t get much simpler than this!
Another thing we love about this activity is that the end result is something your kids can use or give as a thoughtful gift to a friend, grandparent, or babysitter!
Time Estimate:
1 hour
Age:
4+
Materials:
- Fabric markers
- Fabric paint
- Paint brushes
- Water cup
- Glitter
- Jewels
- Adhesive
- Your preferred fabric item. (Some of our favorites includes canvas totes, zipper pencil cases, and drawstring backpacks)
Instructions:
- Set up all materials on a flat surface.
- Let your children pick the item they want to decorate.
- Have them use paints, glitter, and other supplies to create a one-of-a-kind design.
- Ensure all materials have fully dried before using.
18. Canvas Panels
Allowing your kids to create canvas panels is a great way to let them express their inner artist and create a memorable piece of art for your home!
These canvas creations also make excellent gifts for Mothers Day, Fathers Day, and grandparents birthdays.

Time Estimate:
2 hours
Age:
5+
Materials:
- Canvas
- Table or easel
- Paint
- Paint brushes
- Water cups
Instructions:
- Gather all materials.
- Have your kids set up their canvas on a firm surface, such as an easel or table.
- Let your kids paint the canvas. Optional: you can look up painting designs online for your children to have a reference.
- Allow the panel to fully dry.
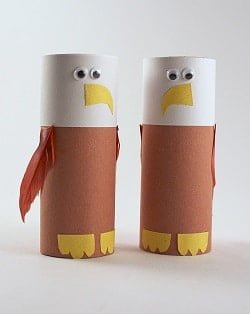
19. Toilet paper roll animals
We love the idea of incorporating household items in with crafts.
And with this craft, you’ll be able to use empty toilet paper rolls!
Making toilet paper roll animals is a super fun and easy craft, and you can make any animal possible with them.
Check out our instructions below for how to make an eagle (source)!
Time Estimate:
30+ minutes
Age:
5+
Materials:
- Empty toilet paper rolls
- Construction paper: brown, white, and yellow
- 2 googly eyes
- 2 small feathers
- Glue
Instructions:
- Cut a piece of brown construction paper large enough to wrap around the entire toilet paper roll.
- Glue one end of the construction paper to the toilet paper roll, then cover the rest of the paper in glue. Wrap the construction paper around the roll and press until the glue sets into the roll.
- Cut a 1.5 inch strip of white construction paper that is long enough to wrap around the roll.
- Repeat step 2 with the white construction paper, making sure the white paper is at the top of the roll.
- Cut out the yellow construction paper into 1 beak and 2 feet.
- Glue googly eyes, beak, and feet onto the toilet paper roll.
- Finally, glue one feather to each side of the toilet paper roll.
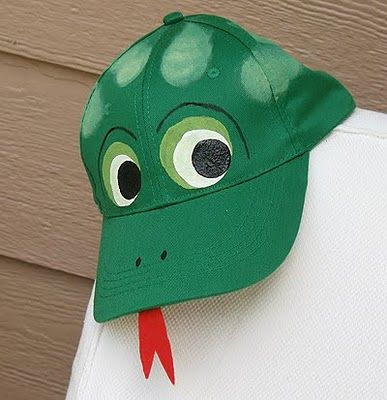
20. Animal baseball caps
Your child will love a hat that resembles their favorite animal!
In this craft, we show you exactly how to create a frog baseball cap (source), but you can use the same materials list and alter the colors for just about any animal!
Time Estimate:
30+ minutes (roughly 1 hour, including time for paint to dry)
Age:
5+
Materials:
- Green baseball hat
- Fabric paint: black, white, green
- Round stencil sponges: large, medium, small
- Black Sharpie
- Toothpick
- 3″x1″ piece of red felt
- Super glue
Instructions:
- Use the large applicator to dot two green circles on the front of the hat (for the eyes).
- While the circles are drying, mix a dot of white in with the green to create a light green, then use the applicator to create random streaks to create the frog’s camouflage coat.
- Once the circles have dried, use the medium applicator to add a white circle on top of each green circle (see image for placement).
- While the white circles are drying, use the Sharpie to create “eyebrows”, which will make the eyes appear raised.
- Use the small applicator to add a black circle on top of each white circle (see image for placement).
- Dip the toothpick in black paint and add two nostrils on the bill of the cap.
- Cut out a tongue shape from the red felt (see above image), making sure to leave about ½ inch for glueing.
- Glue the tongue to the bottom of the bill. Press firmly together to apply.
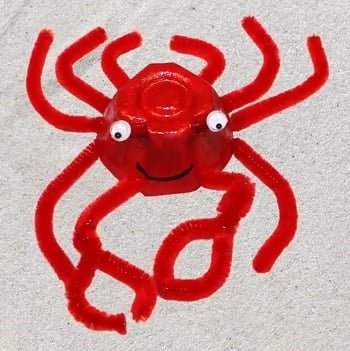
21. Egg carton crabs
Have some leftover egg cartons lying around?
What better way to make use of them than for craft time?
Check out how to turn one cell of egg carton into a crab!
Note: the instructions are very detailed, but it also helps to watch the video (screenshot source below) to get a visual understanding of how to cut and place the pipe cleaners.
Time Estimate:
30+ minutes (allow for paint to dry)
Age:
5+
Materials:
- Egg carton
- Scissors
- Straws
- Red and white paint
- Hot glue (white glue works but takes longer to dry)
- Googly eyes
- Sharpie
- Red pipe cleaners
Instructions:
- Cut out one cell of the egg carton and trim off any excess.
- Poke 2 holes on one of the top edges of the cell roughly ½ apart.
- Cut straw into 1 inch pieces and insert one piece into each hole.
- Hot glue each straw to the egg cell from the inside of the cell.
- Paint entire craft with white paint. Allow paint to dry.
- Paint entire craft with red paint. Allow to dry.
- Glue googly eyes to the tops of the straws.
- Using a sharpie marker, draw a mouth under the crab’s eyes.
- Cut the pipe cleaners into: two 2 inch pieces, two 3 inch pieces, and eight 4 inch pieces.
- Intertwine two of the 4 inch pieces, leaving 1 inch of pipe cleaner on each. Bend the 1 inch ends into a claw shape. Repeat so you have two claws.
- Poke 4 holes on each side of the crab’s body, and 2 holes in the front.
- Add the two 2 inch pipe cleaners to the back holes, then the two 3 inch pieces and four 4 inch pieces to the remaining holes. Bend each pipe cleaner in half to form the legs.
- Attach the two claws to the two holes in the front of the crab.
- Glue all pipe cleaners to the inside of the egg cell.
Summertime Craft Ideas for Older Kids
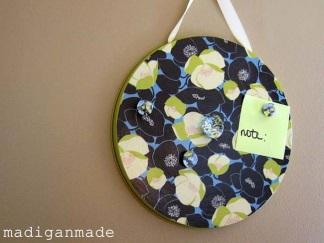
22. Magnet Boards
This is one of our favorite easy summer crafts.
If you have younger children, you will want to save this craft for a time you can supervise since it will take a little bit of guidance.
The end result is a lovely magnet board, which is perfect for use at home or a gift for a loved one.
Time Estimate:
30 minutes
Age:
4+
Materials:
- 1 Metal Burner Cover
- 2 Sheets of Paper
- 1 Glass Stone
- 1 Magnet
- 1 Ribbon
- Glue
- Mod Podge
Instructions:
- First, have your kids choose two coordinating sheets of paper.
- Once they’ve selected their paper, have them trace the top of their metal burner cover onto one sheet of paper and cut just inside of the line. You want the paper to be slightly smaller than the top of the burner cover you are using.
- Next, have your kids apply a thin layer of mod podge to the burner cover and affix the cut out paper to the burner cover.
- After you have attached the paper, have your kids brush over it with another thin layer of mod podge.
- Now it is time to have your kid trace the flat side of their glass stone onto the coordinating paper and cut just inside the line. You want the paper to be slightly smaller than the bottom of the stone.
- Once this is complete, have your child apply a layer of mod podge to the bottom of the stone and attach the paper with the color side up. This will make it so that it is able to show through the top of the stone.
- After it is affixed, brush one more thin layer of mod podge over the paper.
- Next, have your kids use small dots of glue to attach ribbon to the sides of the burner cover so that you can hang it up.
- Finally, attach a magnet to the bottom of the glass stone using a large dot of glue (approximately a ½ inch).
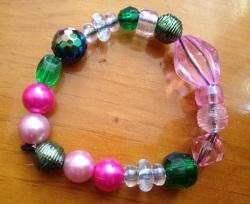
23. Beaded Bracelets
Whether your kids are making friendship bracelets or just designing their next masterpiece, stringing together beaded bracelets is a timeless childhood art project!
Time Estimate:
30 minutes
Age:
5+
Materials:
- Beads
- Charms
- String (elastic string is best)
- Scissors
Instructions:
- Cut the string, leaving plenty of room to knot it when complete.
- Instruct kids to tie a knot at one end (Note: Depending on age, this may require assistance)
- Have children string on beads according to their preference.
- Create a firm knot connecting both ends of the bracelet
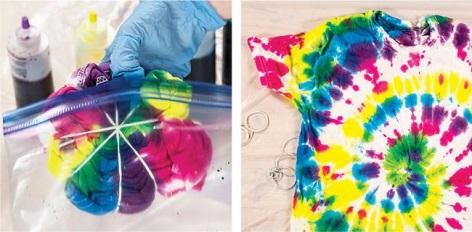
24. Tie Dye
It’s time to get groovy and unleash your inner hippie with this classic coming-of-age art project.
If you are looking for a fun craft to brighten up rainy days, these colorful creations are exactly what you’ve been searching for.
Time Estimate:
2 hours
Age: 5+
Materials:
- Cotton T-shirt
- Large bucket (at least three gallons)
- Fiber-reactive dye
- Soda ash fixative
- Water
- A jar with a lid
- Rubber gloves
- Measuring spoon
Instructions:
- Instruct your children to soak their shirts thoroughly in hot water. Then have then wring out any excess moisture and lay the shirt flat.
- Next you and your kids will want to tie the shirt up with rubber bands.
- Once the shirt is ready to go, it’s time for the fun part! Begin by filling up the bucket with about a gallon of water.
- Have your children mix the paint by filling the jar halfway full of water and adding two to four teaspoons of paint powder. The more paint you add, the darker the color will be.
- Carefully close the jar and shake up the mixture until it is well mixed and pour it into the large bucket of water.
- Following this, have your kids fill the same jar half way full of hot water and add in six teaspoons of your soda ash.
- Similarly to before, you will want to tightly seal the jar and let your kids shake up the mixture.
- Once it is well mixed, pour it into the large bucket.
- Now that your dye bath is ready, it is time to put your tied shirt into the bucket and stir.
- Leave the shirt in the mixture for anywhere from 30 minutes to an hour, depending on how rich you want the color to be.
- After a long soak, use tongs to remove the shirt, and rinse it thoroughly with warm water until the water runs clear.
- Allow shirt to fully dry, and show your exciting new apparel to the world!
25. Glow in the dark stars
Glow in the dark stuff is just so much fun! And with this craft, you’ll be able to make your own glow in the dark stars (or whatever you’d like!).
Once done you can hang them on your kid’s ceiling or walls to mimic the starry sky! (source)

Time Estimate:
30+ minutes (roughly 1 hour, including time for paint to dry)
Age:
5+ (adult supervision required if using spray paint)
Materials:
- Construction paper or similar
- White paint
- Glow in the dark paint (spray paint is optional)
- A surface to paint on
- Scissors
Instructions:
- Using the construction paper, cut out star shapes. Don’t forget a moon!
- Cover each shape with a layer of white paint.
- Allow time for paint to dry (roughly 15-20 minutes).
- Apply glow in the dark paint (if using spray paint, apply in well-ventilated area).
- Allow time for paint to dry.
- Expose shapes to sunlight or a bright light indoors to charge/recharge glow in the dark paint.
- Optional: apply sticky tack to the back of shapes to place on walls or ceilings!
26. Chia pets
Remember these zany commercials from your childhood?
Well, now it is time to make your very own wacky pet in a few easy steps with one of the most entertaining summer crafts for kids.

Time Estimate:
1 hour
Age:
5+
Materials:
- 1 Nylon Pantyhose Foot
- 2 Tablespoons of Grass Seed
- 1 Cup of Potting Soil
- 1 Rubber Band
- 2 Googly Eyes
- 2 Small Glue Dots (in supply bins)
- 1 Plastic Cup
Instructions:
- Have your kids hold open the cut panyhose feet and fill the bottom with about two tablespoons of grass seed.
- Next, have your kids assist in adding about three scoops of potting soil on top.
- Help your kids tie a firm knot at the top, creating a “head.”
- Once this is done, assist your kids in using a rubber band to create a “nose” on the chia pet and gluing on the eyes.
- And now it is just a matter of time! Water the top of the head every day until the “hair” sprouts.
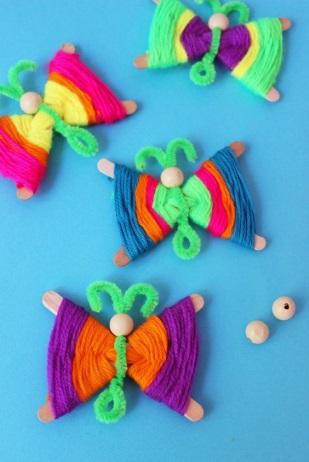
27. Weaving
Weaving is a wonderful craft idea that will help your children develop fine motor skills and explore their artistic side.
In this post, we detail how to create woven butterflies, but you can also easily use these supplies to create other classic summer crafts for kids, like God’s Eyes or baby turtles!
Time Estimate:
1 hour
Age:
5+
Materials:
- Popsicle sticks
- Yarn
- Pipe cleaners
- Beads
Instructions:
- First, have your kids place two popsicle sticks into an X shape.
- Next, instruct them to wind their yarn around the middle of the X in both directions until the two sticks are firmly connected.
- Now it’s time to start weaving! Your children will want to wind the yard up each side until they reach the gap in between the sticks. At this point, they should change to a figure eight weave.
- To switch colors, all they need to do is tuck the current thread into the winding and switch color.
- When your kids reach the end of the wings, help them tie a secure knot at the end of the woven section.
- Now that the weaving is complete, it is time to create the body of the butterfly. To do this bend a pipe cleaner in half and wrap it around the middle of the X. Twist the bottom portion and secure the top with a bead.
- Finally, have your kids curl the end of the pipe cleaners into two antennae, and voila! You have your very own butterfly creations.
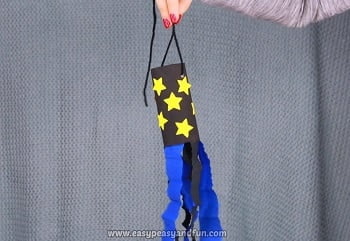
28. Toilet roll windsock
Windsocks are a cool addition to any house, and making them with your kids can add some extra flair and sentimental value.
To make some super cool space windsocks from toilet paper rolls, check out the instructions (or video) below!
Time Estimate:
20 minutes
Age:
5+
Materials:
- 1 toilet paper roll
- Paint
- Hole punch (regular)
- Star hole punch
- Yellow construction paper
- Streamers: blue and black
- Yarn
- Glue
Instructions:
- Start by painting your toilet paper roll black. Let paint dry.
- Using the normal hole punch, punch two holes on opposite sides of the toilet paper roll, roughly ¼ inch from the top.
- Cut a piece of string (roughly 10 inches) and thread through the 2 holes you just made. Tie a knot to form the loop to hang your windsock with.
- Use the star hole punch to punch out roughly 10-12 stars from the yellow construction paper.
- Glue each star to the toilet paper roll, leaving a little space in between each. Let glue dry.
- Cut 3 1 foot pieces of black and blue streamers. Glue one end of each streamer (about 1 inch) to the inside of the toilet paper roll. Be sure to alternate between blue and black while glueing.
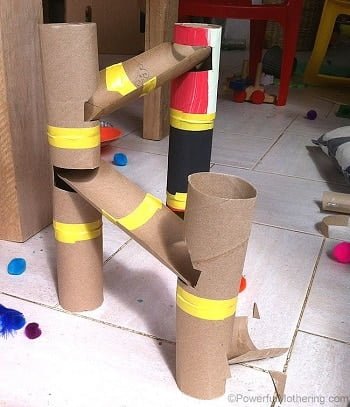
29. Toilet roll marble track
Having the freedom to make something completely unique is always a fun addition to craft time.
And that’s what you’ll get with our toilet roll marble track tutorial.
We’ll show you the basics, and a super cool video from Brick Building Kids of what you can make, but the rest is up to your imagination!
Time Estimate:
30+ minutes (time depends on how long your track is)
Age:
5+
Materials:
- Empty toilet paper & paper towel rolls
- Tape
- Scissors
- Marbles
- A flat surface
Instructions:
- To make the track: making pieces for the track is really simple. All you have to do is cut your toilet paper or paper towel rolls in half horizontally. This will give you two pieces of “track” that you can then tape together.
- For the supports: simply cut the paper towel or toilet paper rolls to length and set them up vertically. You can then tape the base of the rolls to your flat surface and the top to your track.
- A trick for corners: sometimes you’ll have a very steep drop that leads into a corner. If you opt for this design, be sure to build up the corner by stacking extra track on the corner itself. This way if the marble shoots down it won’t fly off the track!
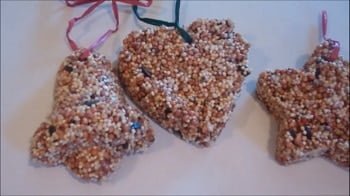
30. Birdseed ornaments
Birdseed ornaments are the perfect crafts that can also be gifts for family members or friends.
They do require a bit more time than our other crafts, but we promise it’s worth the effort!
Time Estimate:
1 hour to create and 8 hours to chill in the fridge
Age:
7+
Materials:
- 1 large bowl
- 1 glass measuring cup
- 1 pack of unflavored gelatin
- 4 cups of birdseed
- Light corn syrup
- All-purpose flour
- Measuring spoons
- Wooden mixing spoon
- Molds or cookie cutters
- Wax paper
- Cookie sheet or similar
- Butter knife
- Metal skewer or similar
- Straws
- String
Instructions:
- Measure out 4 cups of birdseed. Pour birdseed into your large bowl.
- Add ¾ of a cup of flour to your bowl. Mix well.
- Heat ½ cup of water for 30 seconds in the microwave.
- Add envelope of gelatin to the hot water. Mix well (if gelatin and water aren’t mixing, simply put back into the microwave for 30 more seconds).
- Add 3 tablespoons of corn syrup to the gelatin mixture. Mix well.
- Pour the mixture into your bowl with the birdseed. Mix well and make sure to coat the birdseed with the liquid mixture.
- Lay a sheet of wax paper on top of your cookie sheet and place your mold/cookie cutters on top of the paper.
- Scoop the birdseed mixture and add to the molds. Press firmly inside to flatten out the middle of the birdseed.
- Take a knife and scrape around the edges of your molds and fill in any spots that might’ve been missed inside the mold.
- Poke a small hole in the top of your birdseed mold using the metal skewer.
- Once the hole is wide enough, cut a piece of straw and place it in the hole (to make sure it doesn’t close up when chilled).
- Chill molds in the fridge for 8 hours.
- Pop birdseed out of the molds and add your string to create a loop for hanging.
So there you have it: 30 summer crafts for kids to help you keep some sanity in your home this summer season!
And who knows?
You might even end up creating a masterpiece of your own!